Hundreds of dollars might be spent on a complete set of professional pet care supplies. However, it doesn’t have to be costly to take care of your pet’s grooming requirements. You can save a lot of money and create functional DIY grooming products that are on par with their commercial equivalents if you have a little creativity, a few everyday home goods, and a little money. By creating your own grooming products, you can not only save money but also personalize them to your preferences. You can alter each item to fit your pet’s size, temperament, and requirements. Additionally, making items by hand that keep your cherished pet clean, healthy, and content has a very fulfilling aspect.
This thorough tutorial will show you how to make a variety of do-it-yourself grooming equipment out of affordable materials and everyday household objects. You’ll learn how to assemble a full grooming kit without breaking the bank, from brushes and combs to bathing accessories and nail care products.
Understanding Your Pet’s Grooming Needs
Knowing what your particular pet needs is crucial before beginning to make your own tools. Different grooming techniques and equipment are required for coat kinds, sizes, and temperaments.
Basic brushing equipment is required for short-haired pets in order to disperse natural oils and remove loose hairs. Although they usually don’t need to be groomed as often, they nevertheless benefit from routine care to keep their skin healthy and stop shedding.
Long-haired pets require more specialized equipment for brushing, detangling, and removing mats. To keep their coat healthy and avoid uncomfortable mats, they require frequent care.
In order to remove loose undercoat, particularly during shedding seasons, double-coated breeds need instruments that can reach through the topcoat.
Gentler equipment and a gradual introduction to grooming activities are beneficial for sensitive pets. For animals who are agitated or frightened, do-it-yourself gadgets can be modified to be particularly mild.
Knowing these needs can help you decide which do-it-yourself tools to make first and tailor them to your pet’s unique needs.
Essential DIY Brushing Tools
The core of each do-it-yourself grooming kit is the creation of efficient brushing equipment. Compared to specialized equipment, these tools are utilized more frequently and manage daily upkeep.
Make Your Own Slicker Brush Substitute: Convert an outdated paddle brush into a useful tool for pet grooming. Using pliers, carefully remove the existing bristles. Then, drill tiny holes in the paddle’s surface. You may buy replacement bristles online or use wire bristles from an old pet brush. Make sure all of the bristles are the same length for uniform brushing motion and secure with strong epoxy glue.
Use the softer bristles from used hairbrushes or even clean mascara wands for a kinder version. For delicate pets or the areas around the face and ears, this makes the ideal tool.
Homemade Pin Brush: Using bobby pins or hair clips and a clean rectangular sponge, make an efficient pin brush. At regular intervals, insert the bobby pins through the sponge, leaving a half-inch sticking out. The pins efficiently remove stray fur and debris, and the sponge offers a comfortable grip and flexibility.
To make the handle part more comfortable during prolonged grooming sessions, wrap it with fabric or grip tape. This brush is very effective for pets with medium to long hair.
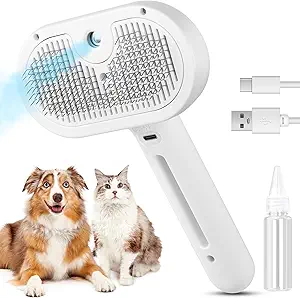
Cat Steam Brush Hair Removal Comb Water Brush Long Short Haired
DIY Deshedding Tool: Make a low-cost deshedding tool with electrical tape, a fine-toothed comb, and a clean razor (first remove the blades). Make sure the teeth of the comb face outward and use electrical tape to secure it to the razor handle. This produces a useful instrument for eliminating loose fur and undercoat. To prevent skin irritation, always try on a tiny area first and use light pressure. Double-coated breeds benefit most from this instrument during shedding seasons.
Creative Bathing Accessories
Non-Slip Bath Mat: Use an exercise mat or yoga mat to create a secure surface for bathing. After cutting the mat to fit your sink or bathtub, drill drainage holes all over it. The pores allow water to drain correctly, and the rough surface keeps people from slipping. Adhere tiny rubber dots or strips to the mat’s surface for further traction. This do-it-yourself mat offers comparable safety and comfort to commercial pet bath mats at a fraction of the price.
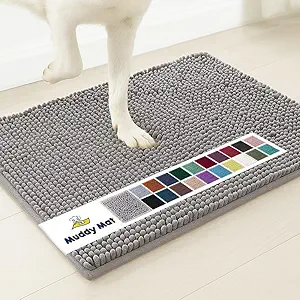
Muddy Mat® Shown on TV Super Absorbent Microfiber Dog Door Mat for Muddy Paws, Non-Slip Washable
Handheld Rinse System: Make a useful rinsing tool out of a plastic bottle. Drill several tiny holes in the bottom of a large yogurt container or a clean plastic bottle. Fill with water for a more manageable, gentle rinsing experience than a full shower head. This softer water flow calms anxious pets while still giving them a good rinse. You can alter the openings so that they are larger for more water pressure and smaller for a softer flow.
DIY Grooming Restraint: Make a soothing restraint system with clips and a cloth. Huge towels can be made into “pet burritos” that offer security and access to various body areas for personal hygiene. To secure the towel in place, use clothespins or thick binder clips. This method is particularly effective for cats and small dogs that get nervous when being groomed. The cozy sensation soothes apprehensive pets and is similar to swaddling.
Waterproof Apron Alternative: Make useful grooming aprons out of plastic tablecloths or discarded rain gear. After cutting to the proper size, knot with ribbon or strips of fabric. This saves you money on professional grooming aprons while protecting your clothing during messy grooming sessions.
To keep treats, brushes, and other grooming items handy during sessions, sew pockets into cloth pouches.
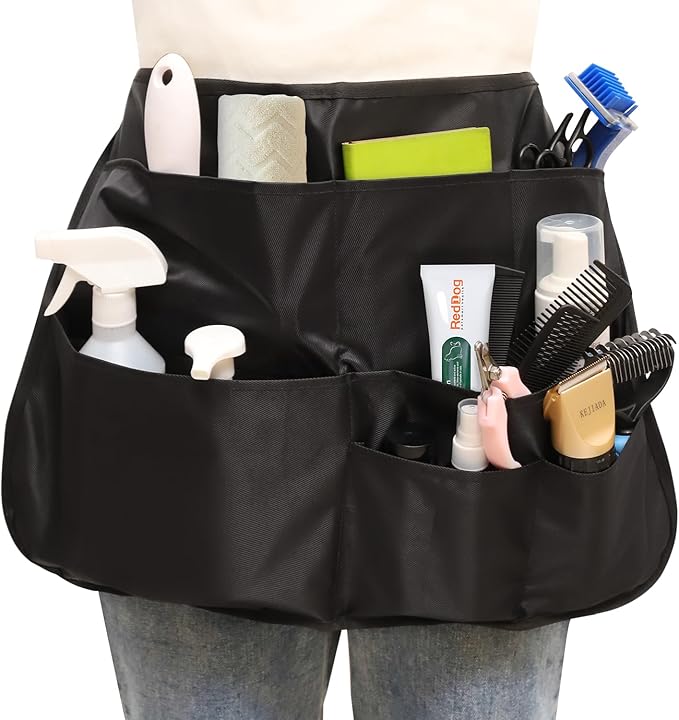
Rsobl Pet Groomer Pocket Apron Waterproof
Nail Care Solutions
DIY Nail Filing Station: Make a nail filing board out of plywood and sandpaper. Use spray adhesive to adhere medium-grit sandpaper to a small piece of plywood. This eliminates the need for clippers and enables gradual nail shrinking. As part of routine play, teach pets to “shake hands” or “high five” against the file board. This method creates good associations with nail care while gradually reducing nail length naturally.
2-in-1 Cat Nail Clippers & Dog Nail Clippers Trimmers for Large Medium Small Dogs Cats
Homemade Styptic Powder: In order to make emergency styptic powder for mild nail bleeding, use equal parts cornstarch and baking soda. Keep available for nail salon visits and store in a tiny container. Although it isn’t as good as store-bought remedies, it offers quick relief for small cuts.
Because even with cautious expertise, accidents can happen, always have this mixture ready before trying nail trims.
DIY Nail Trimming Restraint: Using a towel and rubber bands or clips, create a cozy constraint. Only the paw you’re working on should be exposed as you tightly wrap the pet in a towel. This keeps the pet from wriggling and makes the procedure safer for the owner and pet. When your pets are relaxed and at ease, use this wrapping approach. To establish positive connections, give them praise and rewards.
Candure Dog Nail Clippers and Trimmer with Safety Guard
Ear and Eye Care Tools
Cotton Swab Alternatives: Make safer ear cleaning instruments with long tweezers or hemostats and cotton balls. While the instrument provides control and keeps material from being forced deeper into the ear canal, the cotton ball offers a gentle cleaning surface. Only clean the parts of the outer ear that are visible; never put anything inside the actual ear canal. This do-it-yourself tool is kinder than cotton swabs and offers more control than just fingertips.
VetWELL Ear Cleaner for Dogs and Cats – Otic Rinse for Infections and Controlling Ear Infections and Odor in Pets – 8 oz
DIY Ear Cleaning Solution: To make a powerful ear cleaner, combine equal parts rubbing alcohol and white vinegar. A few drops of glycerin might be used to lessen the harshness. This blend inhibits the growth of bacteria while aiding in the dissolution of wax and debris. To make sure the solution isn’t too harsh, always warm it to body temperature before using it and try it on your own skin first.
Gentle Eye Wipes: Make reusable eye cleaning cloths with saline solution and soft baby washcloths. Store washcloths in a container with saline solution after cutting them into smaller squares. These offer mild cleansing for eye discharge and tear stains. To avoid cross-contamination, use different towels for each eye and be sure to wash them well in between applications.
HICC PET Eyes Wipes for Dogs & Cats, Vet-Recommended Dog Eye Infection Treatment, Gently Remove Tear Stain, Debris
Dental Care DIY Tools
Fingerbrush Alternative: To make an efficient tooth cleaning tool, wrap a piece of gauze or a soft cloth around your finger and fasten it with a rubber band. For pets who are unfamiliar with dental treatment, this is frequently less frightening and offers better control than conventional toothbrushes.
As your pet becomes used to the procedure, gradually introduce pet-safe toothpaste. Start with just water.

HICC PET Teeth Cleaning Wipes for Dogs & Cats, Vet-Recommended Remove Bad Breath & Plaque
DIY Dental Chews: Make nutritious dental chews with frozen broth, sweet potatoes, or carrots. Slice sweet potatoes lengthwise and dehydrate in the oven at low temperature until chewy but not firm. The act of chewing aids in the natural removal of plaque.
When giving chew toys to pets, always keep an eye on them and take away any parts that get small enough for them to swallow whole.
Breath Freshening Treats: Combine coconut oil, mint, and parsley to make natural breath-freshening treats. To store, form into little balls and freeze. These naturally freshen breath while also improving oral health. Make sure every ingredient is safe for pets, and introduce them gradually to prevent upset stomachs.
Conclusion
DIY grooming tools require careful attention to safety to prevent injury to both pets and owners. Use only non-toxic substances that won’t hurt pets if they mistakenly consume them. Make sure all adhesives are pet-safe once dry and steer clear of any little bits that could choke a pet.
Check your do-it-yourself tools frequently for wear, sharp edges, or potentially dangerous loose parts. Tools should be replaced or repaired as soon as damage is noticed. Clean all tools thoroughly after each use to prevent bacterial growth and skin infections. Use pet-safe disinfectants and ensure tools are completely dry before storage.
The long-term advantages include major cost savings, customization opportunities, and the satisfaction of making useful goods with your own hands, even though DIY equipment may demand a larger initial time investment than buying commercial products. Because they are made especially for their pet’s needs, many pet owners discover that their do-it-yourself gadgets perform better than pricey commercial options.
Jasper Dog Toothbrush, 360 Dog Tooth Brushing Kit, Finger Toothbrush, Cat Tooth Brush