Let us be honest—when it comes to grooming our furry friends at home, we usually tackle the easy stuff first. A quick brush? No problem. A nice bath? Sure, we can handle that. But then there are those areas. You know the ones I am talking about. The paws your dog yanks away the moment you touch them. The ears that somehow accumulate mystery gunk. And those teeth… well, let us just say doggy breath does not fix itself.
I have been there, trust me. My Golden Retriever, Max, used to act like I was performing surgery every time I tried to trim his nails. But here is the thing: these “difficult” grooming areas are not just about keeping your pet looking good—they are critical for their health and wellbeing.
Today, I am going to walk you through everything you need to know about grooming those tricky spots: paws, ears, and teeth. No fancy equipment required, no professional grooming degree necessary—just practical, straightforward advice that works.
Why These Areas Matter More Than You Think
Before we dive into the how-to, let us talk about the why. Understanding what is at stake makes the whole process feel less like a chore and more like the essential care it really is.
The Hidden Dangers of Neglected Paw Care
Overgrown nails are not just a cosmetic issue. When your dog’s nails grow too long, they can:
- Press painfully into their paw pads with every step
- Change their walking gait, leading to joint problems in their hips, shoulders, and spine
- Snag on carpets or furniture, causing painful tears that can get infected
- Curl around and grow into the paw pad itself (yes, it is as awful as it sounds)
I learned this the hard way when Max started limping slightly after our walks. The vet explained that his overgrown nails were forcing his toes to splay out unnaturally, putting stress on his entire leg. Within two weeks of regular nail trimming, he was back to his bouncy self.
Ear Infections: A Common Yet Preventable Problem
Your pet’s ears are basically a warm, moist cave—perfect conditions for bacteria, yeast, and even ear mites to set up shop. Dogs with floppy ears (like Cocker Spaniels, Basset Hounds, and Labs) are especially vulnerable because air cannot circulate properly.
Regular ear cleaning helps you:
- Prevent painful ear infections that can cost hundreds in vet bills
- Spot early warning signs of allergies or other health issues
- Remove debris before it causes irritation
- Keep that distinct “ear funk” smell at bay
Dental Disease: The Silent Threat
Here is a sobering statistic: by age three, over 80% of dogs show signs of periodontal disease. Left untreated, bacteria from their mouths can enter the bloodstream and damage their heart, liver, and kidneys.
Regular teeth cleaning is not about vanity—it is about adding healthy, pain-free years to your dog’s life.
Part 1: Mastering Paw and Nail Care
Alright, let us start with what many pet owners find most intimidating: nail trimming.
Understanding Nail Anatomy (It is Easier Than It Sounds)
Every nail has two parts:
- The hard outer shell – This is what you trim
- The quick – The pink, living tissue inside containing blood vessels and nerves
On light-coloured nails, the quick looks pink and is easy to spot. On dark nails? You are basically flying blind, which is why we trim conservatively.
Essential Paw Care Tools
You do not need to break the bank. Here is what matters:
- Nail clippers: Guillotine-style for small to medium dogs, scissor-style for larger breeds
- Nail grinder (optional): Great for anxious pets or smoothing sharp edges
- Styptic powder: For those “oops” moments when you nick the quick
- Treats: Your secret weapon for positive reinforcement
- Paw balm: For cracked or dry paw pads (especially important in winter)
The Step-by-Step Nail Trimming Process
Step 1: Create the Right Environment
Choose a well-lit, quiet space. For small dogs, your lap works great. For larger dogs, have them lie on their side on a non-slip surface.
Step 2: Desensitize Your Pet
If your dog is new to nail trims, spend a few days just handling their paws. Touch the paws, spread the toes gently, tap the nails with the clipper (without cutting), and reward heavily with treats. Make it boring and predictable.
Step 3: The Actual Trim
Hold the paw firmly but gently—like you mean business but you are not trying to crush anything. Isolate one toe at a time.
For light nails: Trim just before the pink quick, leaving about 2mm of space.
For dark nails: Take tiny snips (1-2mm at a time). After each cut, look at the cross-section. When you see a greyish or white oval appear in the canter, stop—you are getting close to the quick.
Step 4: Reward Immediately
After each nail (yes, each individual nail), give a treat and praise. This creates a positive association and makes future sessions easier.
What to Do If You Hit the Quick
Do not panic—it happens to everyone, even professional groomers. The nail will bleed and your dog will likely yelp or pull away.
Here is what to do:
- Stay calm (your anxiety transfers to your pet)
- Apply styptic powder or cornstarch to the nail
- Apply gentle pressure for 30 seconds
- Give treats and comfort
- Take a break before continuing
The bleeding usually stops within a few minutes. If it continues beyond 5-10 minutes, call your vet.
How Often Should You Trim?
Most dogs need nail trims every 3-4 weeks. You will know it is time when you hear clicking on hard floors. The general rule: if the nails touch the ground when your dog is standing, they are too long.
Dogs who walk frequently on pavement may naturally wear down their nails and need less frequent trimming.
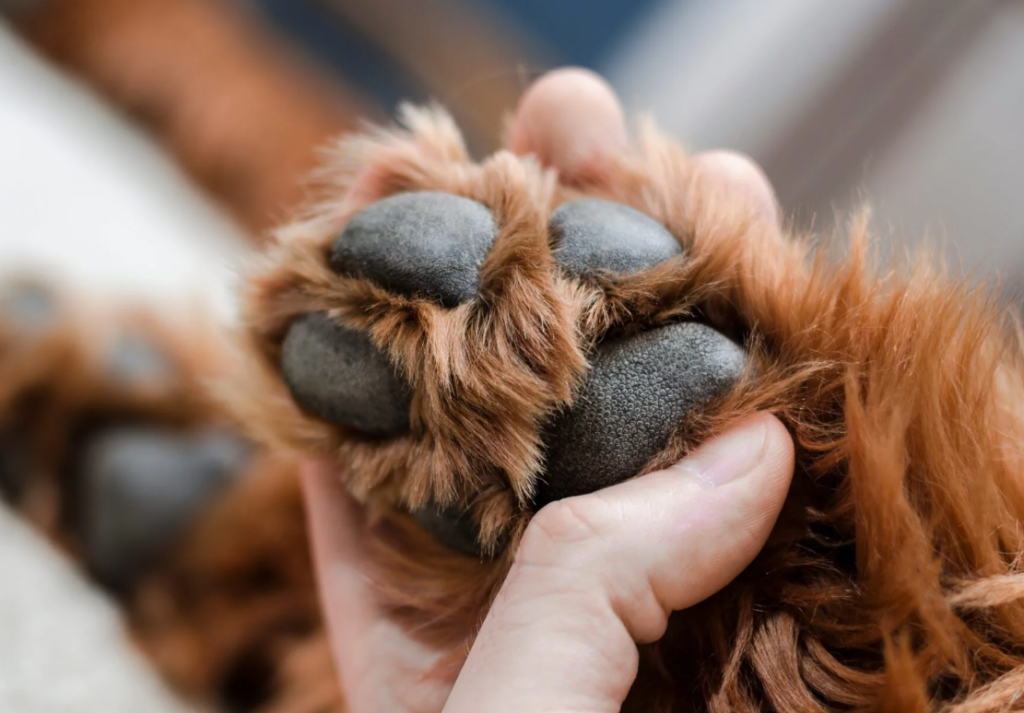
Paw Pad Care: The Often-Forgotten Essential
While you are down there dealing with nails, do not forget the paw pads themselves.
Winter Care: Salt and ice melt can cause painful cracks and chemical burns. After walks, rinse paws with warm water and apply a protective balm. Consider dog booties for extended outdoor time.
Summer Care: Hot pavement can literally burn paw pads. If it is too hot for your bare hand, it is too hot for their paws. Walk early morning or late evening, and moisturize dry pads.
Year-Round: Check between the toes for debris, matted fur, or cuts. Long-haired breeds need the fur between their paw pads trimmed to prevent ice balls (winter) or matting (all year).
Part 2: Safe and Effective Ear Cleaning
Ear cleaning seems straightforward until you are doing it. Here is what works.
When to Clean Your Dog’s Ears
Not all dogs need the same ear care schedule:
- Dogs with floppy ears: Weekly cleaning
- Dogs who swim frequently: After every swim session
- Dogs with upright ears and no issues: Every 2-4 weeks
- Cats: Generally, less frequent, every 2-3 weeks unless prone to ear issues
Red Flags That Need a Vet (Not Home Care)
Do not attempt home cleaning if you notice:
- Excessive redness or swelling
- Foul Odor (like yeast or rotting)
- Dark discharge (could indicate mites)
- Your pet yelping when you touch their ear
- Visible blood or pus
- Balance issues or head tilting
These symptoms suggest an infection requiring veterinary treatment.
The Right Way to Clean Ears at Home
What You’ll Need:
- Vet-approved ear cleaning solution (never use hydrogen peroxide or alcohol—they are too harsh)
- Cotton balls or gauze pads
- Treats
- Towel (things can get messy)
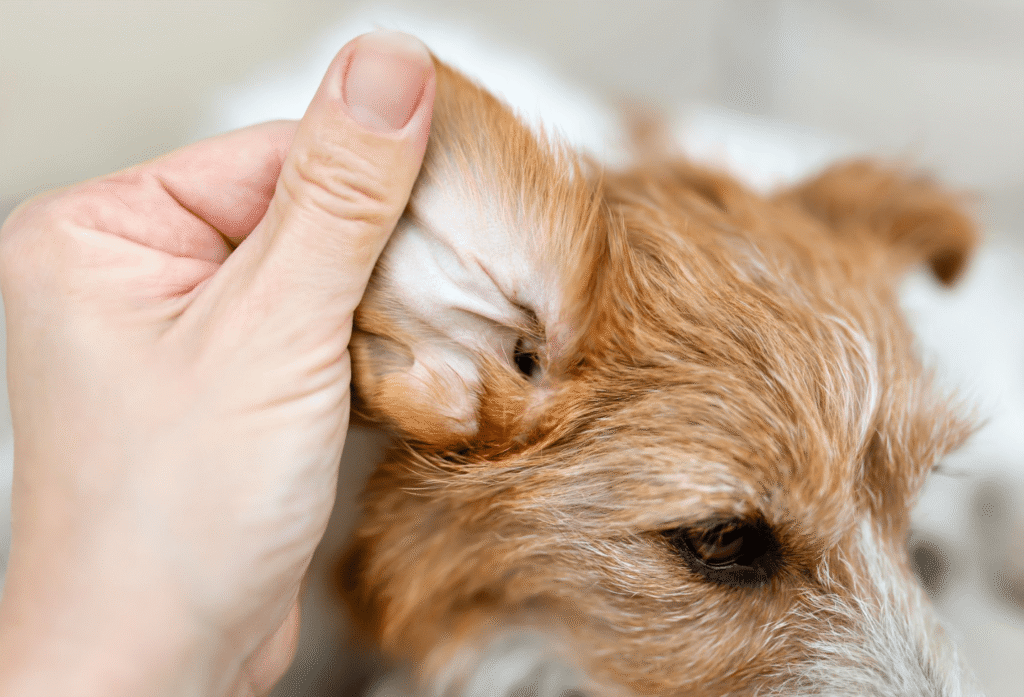
The Process:
- Gently lift the ear flap and inspect. Healthy ears should be light pink with minimal wax.
- Apply the cleaning solution directly into the ear canal. Yes, really squirt it in there—you want to fill the canal. Do not worry, you cannot put it in too deep because of the L-shape of a dog’s ear canal.
- Massage the base of the ear for 20-30 seconds. You will hear a squishing sound. This breaks up wax and debris deep in the canal.
- Let your dog shake their head. Stand back for this part! They will fling out the loosened debris.
- Wipe the outer ear and visible part of the canal with cotton balls. Never stick anything (including cotton swabs) down into the ear canal—you could damage the eardrum or push debris deeper.
- Repeat on the other ear and reward with treats.
What About Ear Hair?
Some breeds (Poodles, Schnauzers, Terriers) grow hair inside their ear canals. Some groomers pluck this hair; others leave it alone. Ask your vet for their recommendation based on your specific dog. If your dog is prone to ear infections, plucking may help with air circulation.
Post-Swimming Ear Care
If your dog loves water, you need a different strategy:
- Place cotton balls in their ears before swimming (remove immediately after)
- Use a drying ear solution after every swim
- Dry the outer ear thoroughly with a towel
- Monitor closely for head shaking or scratching
Part 3: Dental Care at Home
I will level with you: most dogs are not thrilled about teeth brushing. But with patience and the right approach, you can make it work.
The Dental Care Toolkit
Essential:
- Pet-specific toothpaste (NEVER use human toothpaste—xylitol is toxic to dogs)
- Dog toothbrush or finger brush
- High-value treats
Optional but helpful:
- Dental wipes
- Water additives
- Dental chews (VOHC-approved)
- Dental-specific kibble
How to Introduce Teeth Brushing
Most dogs will not just let you stick a toothbrush in their mouth on day one. Here is the gradual approach that works:
Week 1: Let your dog lick pet toothpaste off your finger. That is, it. Get them loving the flavour (chicken, beef, and peanut butter are popular).
Week 2: Rub your finger (with toothpaste) along their gums and teeth. Start with just the front teeth, work up to the sides.
Week 3: Introduce the toothbrush. Let them see it, sniff it, lick it. Associate it with treats.
Week 4: Gentle brushing. Start with just a few teeth and gradually increase.
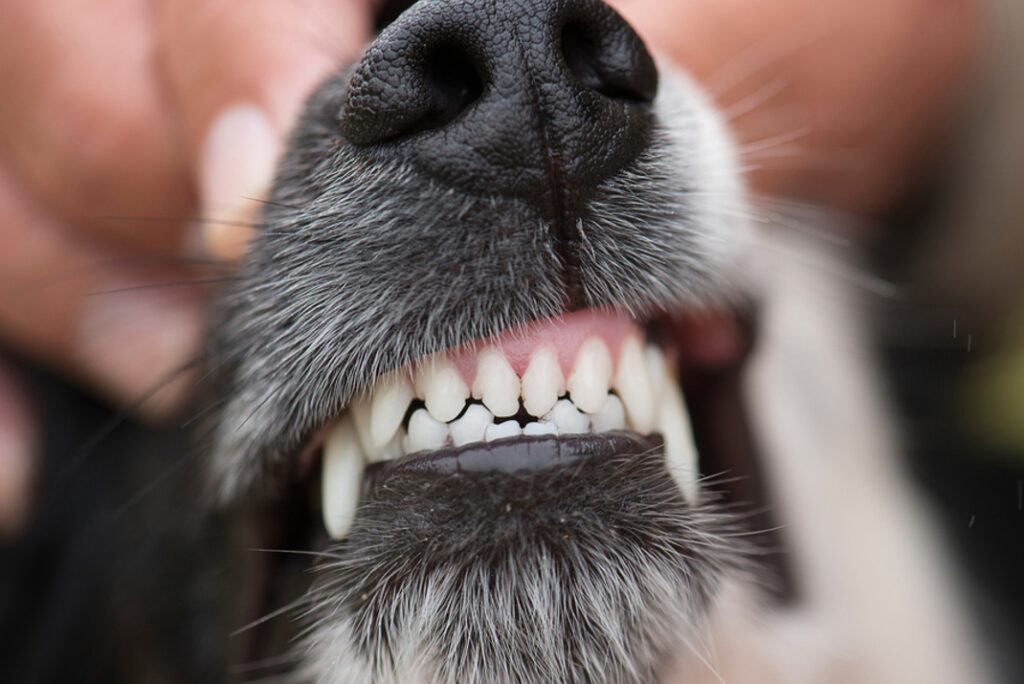
The Proper Brushing Technique
Once your dog tolerates the toothbrush:
- Lift the lip to expose teeth and gums
- Angle the brush at 45 degrees to the gum line
- Use gentle circular motions
- Focus on the outer surfaces (the tongue naturally cleans the inside)
- Pay special attention to the back molars where tartar accumulates most
- Keep sessions short – 30 seconds to 2 minutes is plenty
You do not need to brush the inside surfaces of the teeth—their tongue does that job naturally.
Realistic Expectations: How Often Should You Brush?
Ideally? Daily. Realistically? 3-4 times per week makes a significant difference. Even once or twice a week is better than nothing.
The plaque your dog accumulates hardens into tartar within 24-48 hours, so frequency matters.
Alternatives and Supplements to Brushing
Not every pet tolerates brushing. Here are backup options:
Dental Chews: Look for VOHC (Veterinary Oral Health Council) seal of approval. Greenies, DentaLife, and others can help reduce plaque by about 20%.
Dental Wipes: Better than nothing, but cannot reach the crevices a brush can.
Water Additives: Mix into their drinking water daily. Helps kill bacteria and freshen breath.
Dental Diets: Special kibble designed to mechanically clean teeth as your dog chews.
None of these replace brushing entirely, but they are excellent supplements or alternatives for difficult cases.
Signs Your Dog Needs Professional Dental Cleaning
Even with stellar home care, professional cleanings are eventually necessary. Watch for:
- Visible yellow or brown tartar buildup
- Red or swollen gums
- Persistent bad breath
- Difficulty eating or dropping food
- Pawing at the mouth
- Loose or missing teeth
Professional cleanings require anaesthesia to clean below the gum line and take X-rays. Costs typically range from $300-$1,000 depending on your location and your dog’s dental health.
Common Mistakes to Avoid
Let me save you from the mistakes I made early on:
With Nails:
- Cutting too much at once (conservative cuts are safer)
- Trimming when your dog is anxious or you are in a rush
- Forgetting the dewclaws (those toes on the inner leg)
With Ears:
- Using cotton swabs in the ear canal
- Using harsh chemicals like alcohol
- Cleaning when there is an active infection
- Cleaning too frequently (can cause irritation)
With Teeth:
- Using human toothpaste
- Starting too aggressively
- Only brushing the front teeth
- Giving up after one bad experience
Creating a Positive Grooming Routine
The secret to successful grooming is not technique—it is mindset. Both yours and your pet’s.
Make It a Bonding Experience
Turn grooming sessions into quality time:
- Choose a time when you are both relaxed
- Use high-value treats (think small pieces of chicken, not regular kibble)
- Keep sessions short and positive
- End on a good note, even if you only did one paw or tooth
- Speak in a calm, reassuring voice
Start Young, But It is Never Too Late
Puppies and kittens who learn grooming is normal have an easier time as adults. But even senior pets can learn to tolerate—and sometimes even enjoy—grooming with patience and positive reinforcement.
Know When to Call in the Pros
There is no shame in seeking professional help for:
- Severely overgrown nails
- Dogs with extreme anxiety or aggression during grooming
- Ear infections or other medical issues
- Your first few attempts (a groomer can show you proper technique)
Your Grooming Schedule briefly
Weekly:
- Inspect paws, ears, and teeth
- Clean ears (for floppy-eared breeds or swimmers)
- Brush teeth (ideally daily, but 3-4x/week minimum)
Every 2-4 Weeks:
- Trim nails
- Clean ears (for dogs with upright ears and no issues)
Seasonally:
- Deep paw pad conditioning
- Professional dental evaluation
- Ear care adjustment based on season
As Needed:
- After swimming or getting dirty
- When you notice clicking nails
- When ears look dirty or smell off
Final Thoughts
Here is what I have learned after years of at-home grooming: it gets easier. That first nail trim might take 30 minutes and involve lots of treats and breaks. Six months later, you will breeze through all four paws in five minutes.
The most important thing is not perfection—it is consistency. Regular maintenance prevents the big problems that require expensive vet visits and cause real discomfort for your pet.
Max still is not thrilled about nail trims, but he tolerates them without drama. His ears stay clean and infection-free. And while I cannot say his breath is minty fresh, it is a lot better than it used to be.
Your pet depends on you for care they cannot do themselves. Those difficult grooming areas? They are only difficult until they are not. With the right approach, tools, and patience, you have absolutely got this.
Now grab those clippers, that ear cleaner, and that dog toothbrush. Your pet’s paws, ears, and teeth are counting on you—and trust me, they will thank you for it in their own way.
Have questions about grooming difficult areas? Drop them in the comments below! And if you found this guide helpful, share it with fellow pet parents who might be struggling with their grooming routine.